
Sizing Handmade Paper with Wheat Starch Paste
This past weekend, I attempted—for the first time—to size my handmade paper with wheat starch paste. It’s been on my to-do list for awhile, and I’m so glad I’ve finally had the time to give it a shot. Sizing is an important part of the handmade paper process, especially if the goal is to make a quality paper that one can write, draw, or paint on, so it’s something I’ve wanted to master before I delved deeper into making new paper batches. This article is a little bit of a how-to, but also a recap of what I learned and the outcome of this first sizing test.
What Is Size in Papermaking?
Before I made my first batch of paper, I had no idea what paper size was or why it was necessary. The term “size” is a bit misleading, as this process is not related at all to the actual dimensions of the final sheet. Sizing paper is all about making sheets strong and water-repellant—at least somewhat—so that one may write, draw, or paint on them without degrading the quality of the paper. In essence, it’s a key ingredient to making quality paper that will stand up to the test of time.
It’s easiest to think of the paper you already know to apply the concept of sizing. Paper such as paper towels are incredibly water-absorbent, so there is little to no size in these sorts of papers. Writing paper has a moderate amount of size in it, just enough so that one can write/draw/print in ink. Then there are artists papers, like watercolor paper, that are very water-repellant; these papers have a lot of size in them.
So what is size? Size is, essentially, a glue that one either adds to the paper vat itself (called internal sizing) or applies to the paper after sheets have been formed and dried (called external sizing). There are different types of size, but for my purposes, I first tried wheat starch paste. I chose wheat starch paste primarily because it was the easiest method I found that did not use any animal byproducts, which is important to me.
Making the Wheat Starch Paste

To start the process, I first created the wheat starch paste. The process for making this is very simple. These instructions are adapted from this original post.
Tools
Wheat starch powder (available online here, or check your local art supply store)
Water
Double-boiler
Whisk or rubber spatula
Mason jar (or other glass/air-tight container)
Directions
Fill the bottom pot of the double boiler with water (no need to be precise, just use enough so that it won’t boil dry). Heat on medium until the water is just boiling.
While the bottom pot comes to a boil, mix 1 part wheat starch powder with 4 parts water in the top pot of a double boiler. I used 1/3 cup wheat starch powder to 1 1/3 cups water. This filled about three-fourths of a mason jar, once cooked. Place over the bottom pot of the double boiler and cook while stirring vigorously for 5 minutes. During this time, watch for a change in consistency of the mixture. It’ll start off watery and will gradually become thicker. Once this happens . . .
. . . reduce heat to low and cook covered for about 25 minutes, stirring every few minutes. If the mixture becomes too stiff, add small amounts of water from the bottom pot as needed. By the end of the cook time, the consistency of the paste is what you’d expect from a glue—sort of thick and goopy, like that of yogurt.
When finished cooking, pour in a glass container, seal, and refrigerate overnight. This will allow the paste to gel.

The finished color/texture of wheat starch paste, prior to refrigeration.
Using Wheat Starch Paste as a Size
After at least a night of refrigeration, the paste should be gelled and ready to be used in papermaking.
External Sizing
I first tried externally sizing my paper. This process proved a bit challenging in some ways.
The original directions called for straining the gelled paste through a cloth, so I followed. However, I found this cumbersome and not wholly necessary. The purpose of this, I think, was to get the paste to be a liquid again. I found it was easier to simply add a small chunk of the paste-gel into a blender, dilute it with a bit of water, and blend up. This resulted in a smooth, not-too-heavy paste. Diluting with water is key, as the paste shouldn’t be overly thick when it’s applied to the paper.
Once the paste has been diluted and transformed back into a liquid, place your paper over newspaper. Gently brush the size (paste) onto one side of the paper. You don’t need a lot of size, just enough to cover one side of the full sheet. Then hang to dry, but be sure there’s nothing touching the sized side of the sheet, besides clothespins, otherwise the sheet will be ruined.

Tips & Tricks
Don’t make my mistake! Instead of flipping the paper over to brush the other side of the sheet, hang to dry having only applied the size to one side of the sheet. This is a glue, after all, and unfortunately my first test sheet got stuck to the newspaper because I tried brushing the second side too soon, and the paper was ruined. Lesson learned. I have yet to figure out a way to avoid this and get the size applied to both sides in one pass.
Repeat with however many sheets you’re sizing. When all of the paper has adequately dried, it will have curled due to air drying. (Instead of air drying, you might be able to press each sheet between blotters/cloth and dry under pressure, but I did not try this method.) To flatten the paper, lightly spritz with water, then dry under pressure with a fan blowing on the sheets.

Tips & Tricks
Here’s another lessons-learned moment—it may be better to either: a) let the sized sheets dry longer, like a couple of days, before flattening, or b) place blotters/cloth between each sheet as they dry. I found when I tried to reflatten under pressure, after the sheets had air dried that same day, that the two externally sized sheets stuck together. As a result, both sheets were ruined.
Internal Sizing
After testing a couple of sheets using the external sizing method, I had a lot of left over paste that I thought I’d try adding straight to the paper vat—why not?! This is called internal sizing and is a lot more straightforward than external sizing. The number of steps is greatly reduced, which makes it much more efficient and replicable on larger paper batches.
So, after diluting the rest of the wheat starch paste, I added it to my freshly made pulp, mixed with my hands, then started pulling and drying sheets like normal. That’s it! The only thing to pay attention to is your ratios of size, pulp, and water. The bigger the vat, the more size is going to be needed for it to work as intended, and vice-versa.
Results
All in all, both externally and internally sizing my sheets was a success. The size worked as intended, making the sheets stronger and allowing ink to be applied without degrading the quality of the sheet. I noticed that even things like strength, texture, and foldability were changed for the better by using sizing.
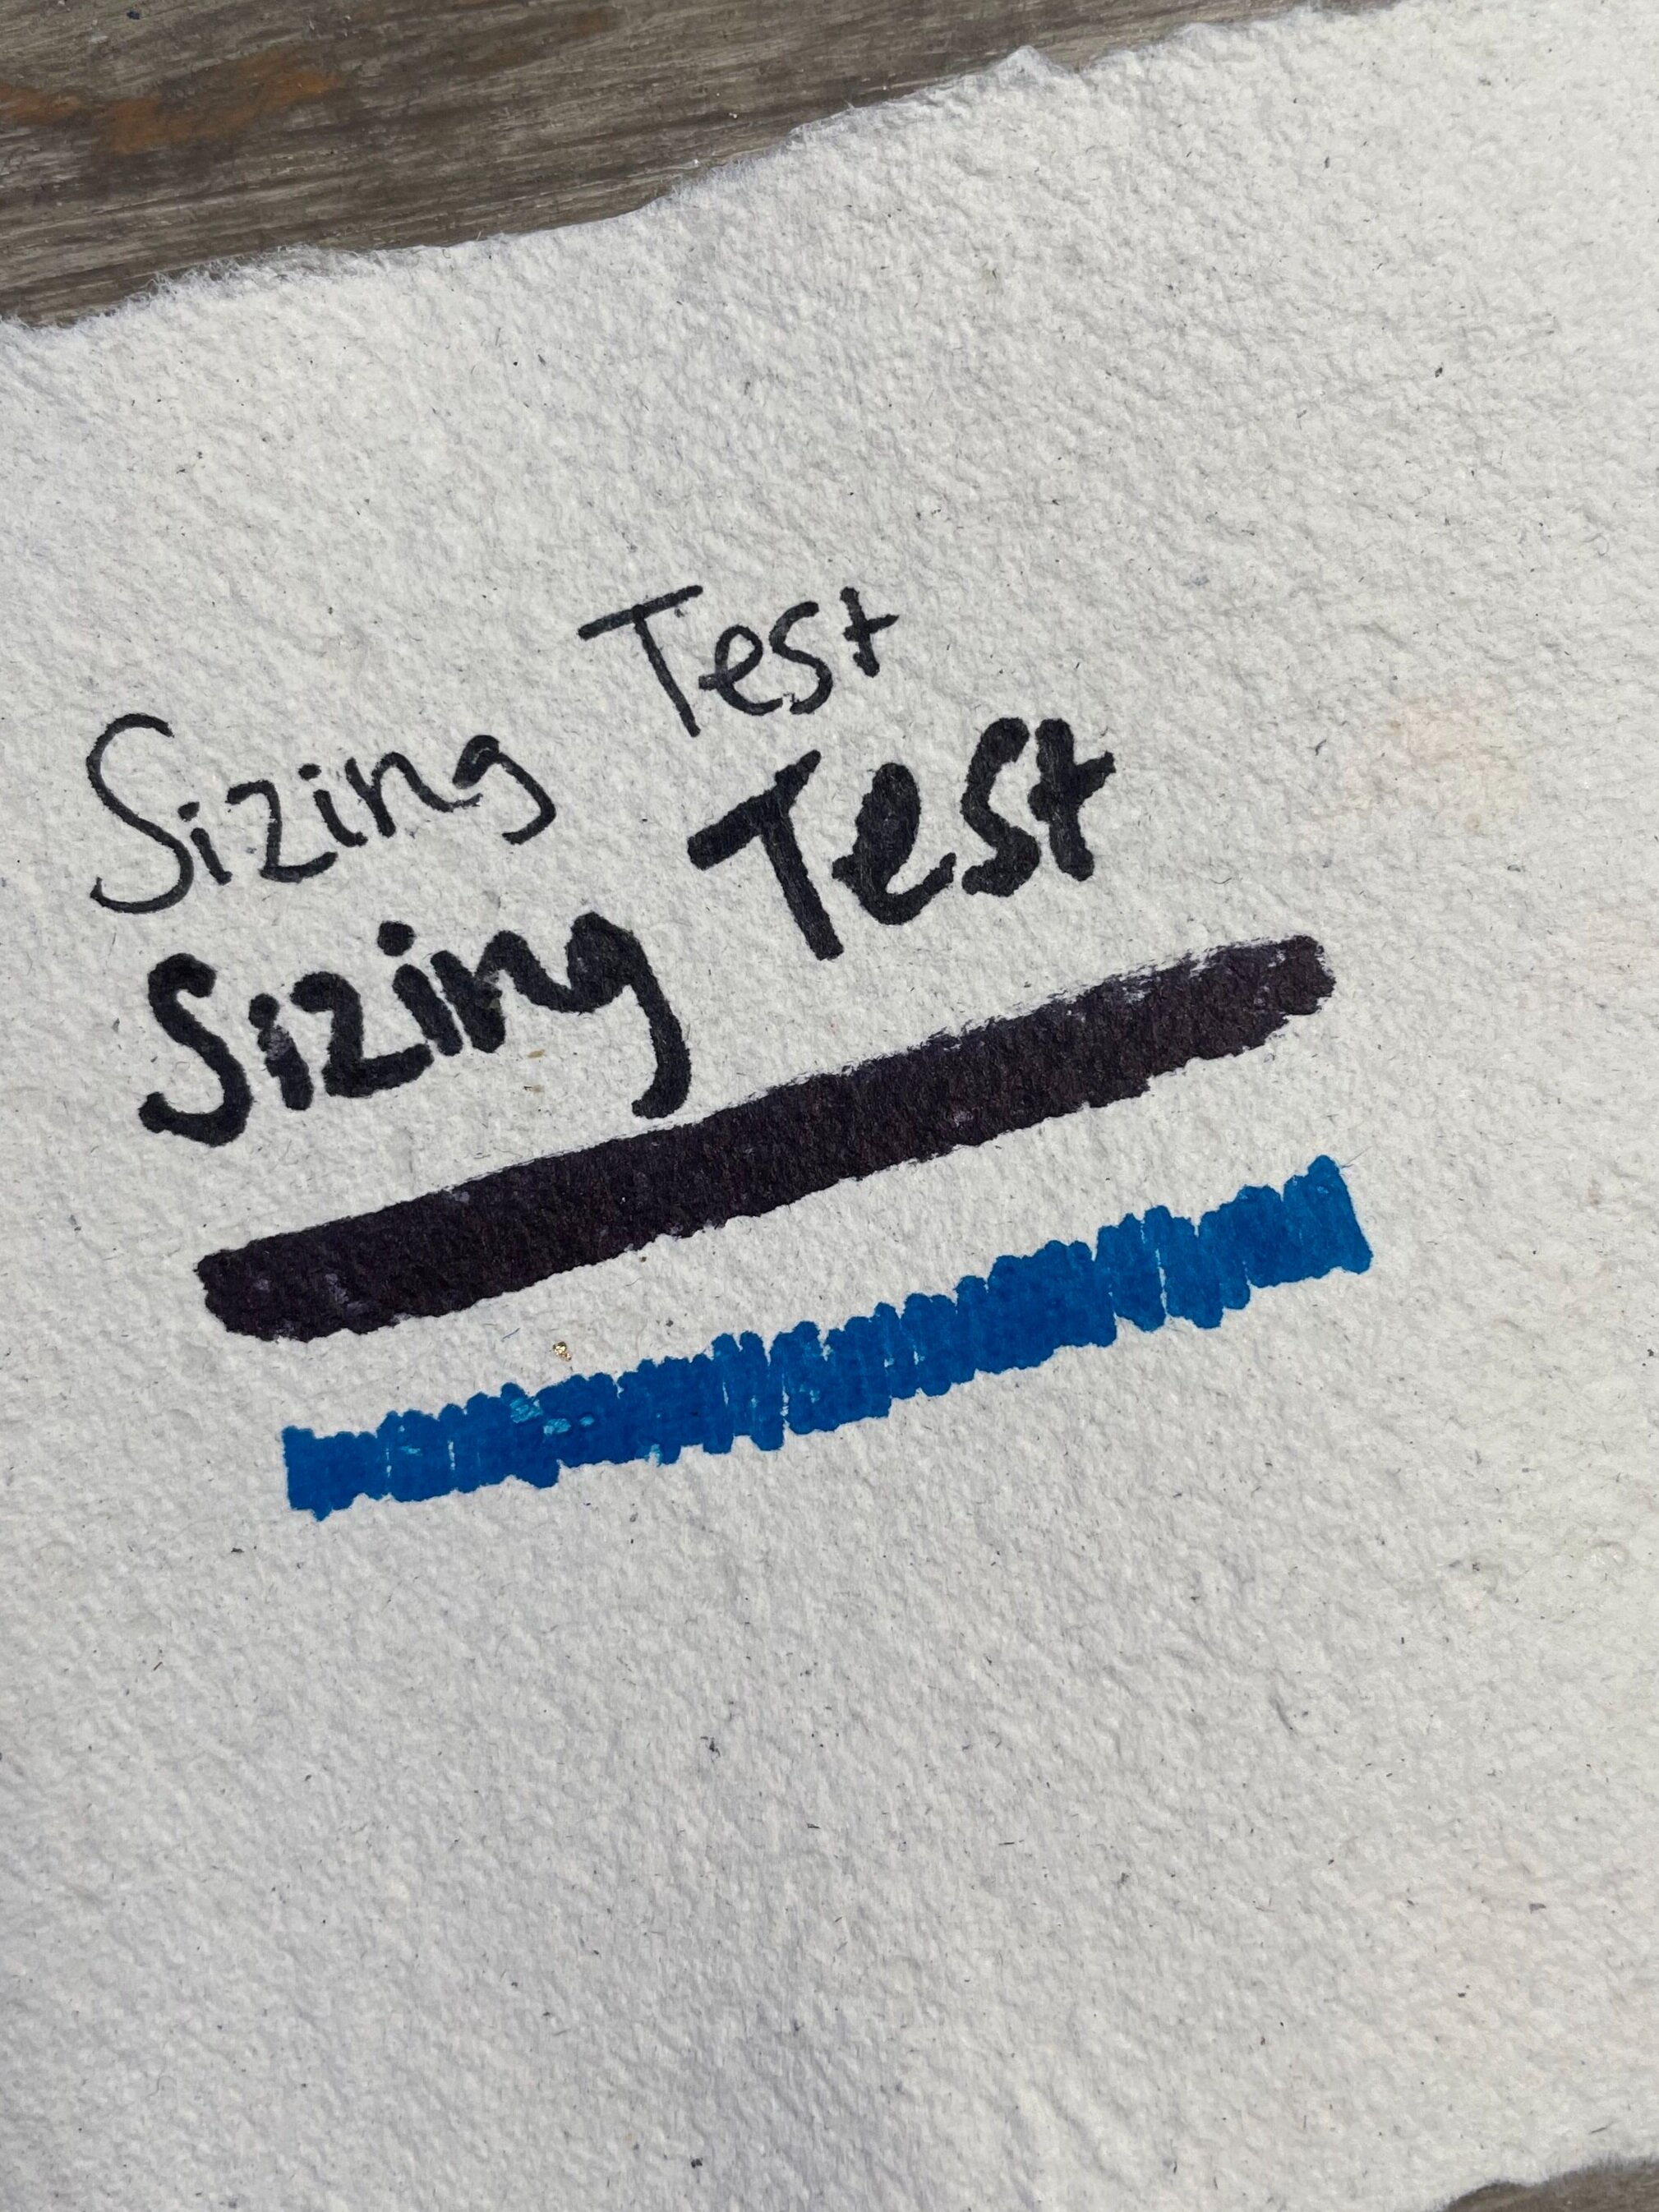
To test the result of each sizing method, all I did was applied some pen/marker ink to the sheet and rubbed my finger over each mark. When you do this on paper that has not been sized, the paper rubs off and the ink smears. After applying size, this should no longer happen.
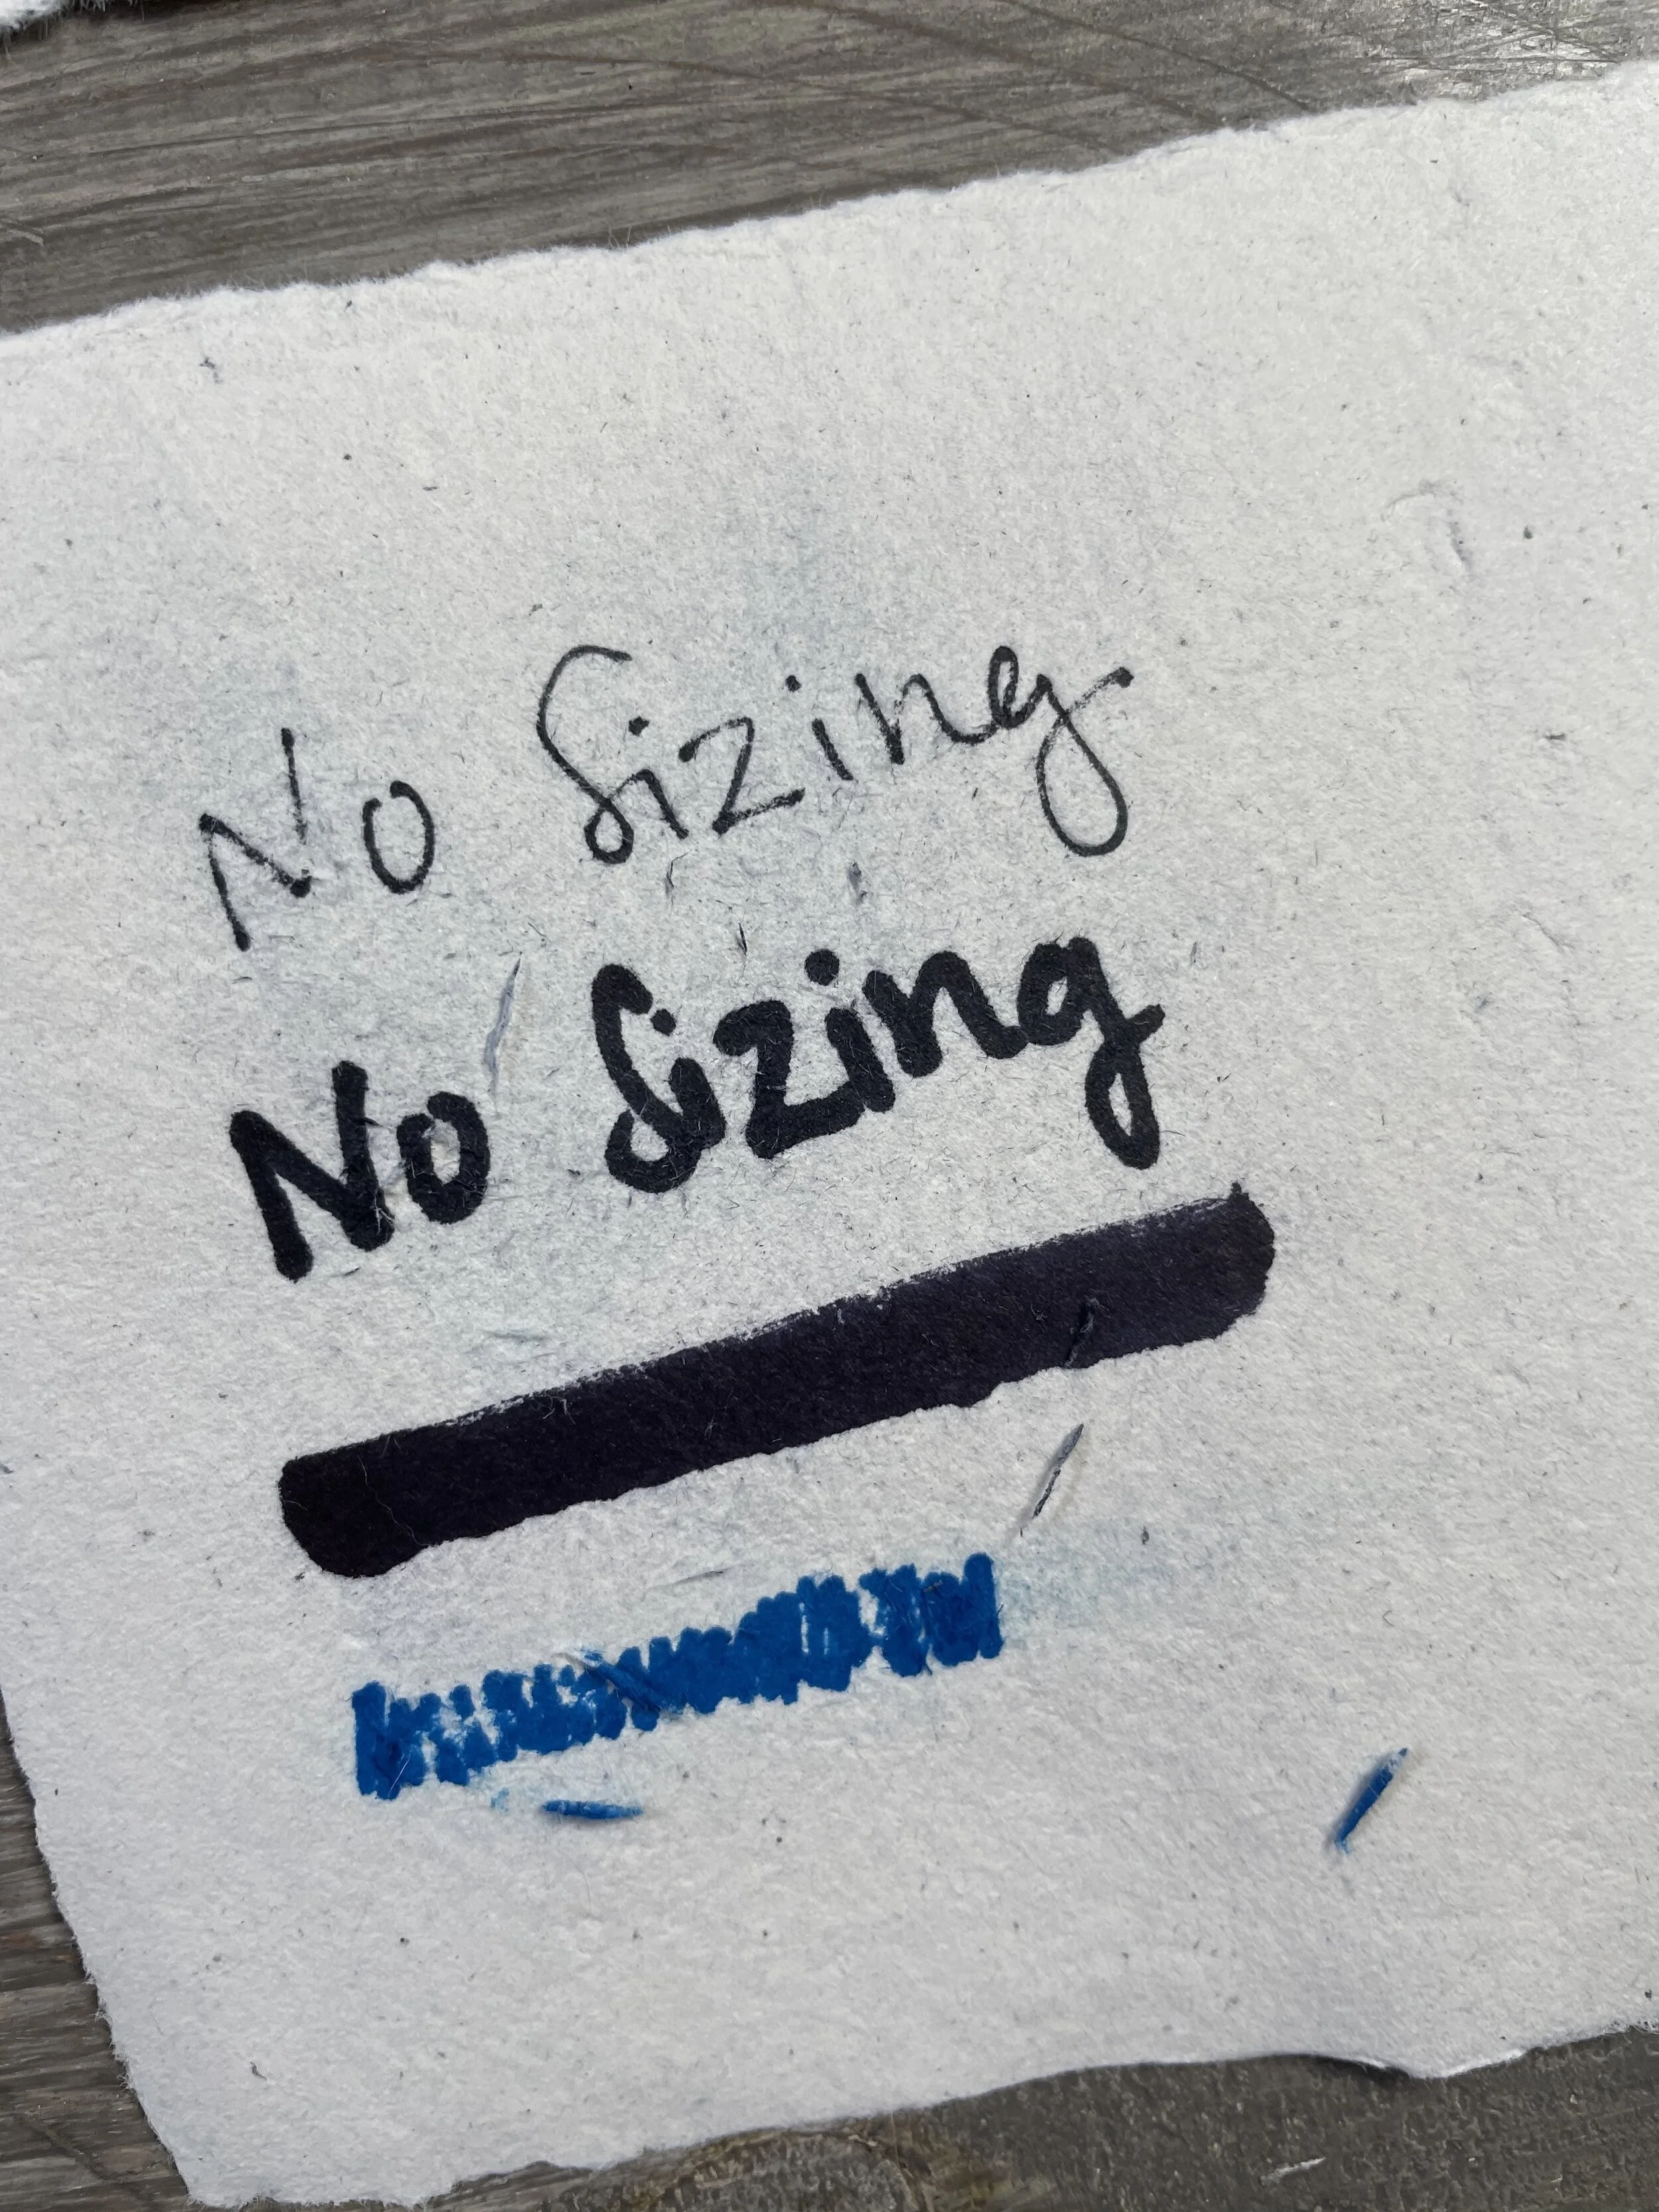
Effect of No Sizing
This is what sheets look like when ink is applied and the sheets have not been sized. The ink smears onto unintended spots and the paper itself starts to flake off too. Not very pretty and definitely not representative of a quality, long-lasting sheet.

External Size Results
After vigorously rubbing the paper when ink was applied, there was no ink smudging or flaking. However, while externally sizing did work, you can see that when ink is applied, it picks up some of the detail of the brush strokes (the streaking).
Internal Size Results
After vigorously rubbing the sheets, the ink still looked nice and crisp and the whole sheet stayed in tact. There is no streaking in the ink on these sheets and the color of the ink is more vibrant than the externally sized sheet, so this sizing method seems superior.
Conclusion
Well, I’m happy to say these experiments were a success! That doesn’t always happen in papermaking, especially when trying something for the first time. Moving forward, I’ll definitely be using the internal size method as it is a lot easier to do and seems to offer a better final result. But I may experiment some more with external sizing as well.
I hope you enjoyed reading this and that you learned something new! If you’re a fellow papermaker and want to talk all things paper sizing, drop a comment below or shoot me a message.